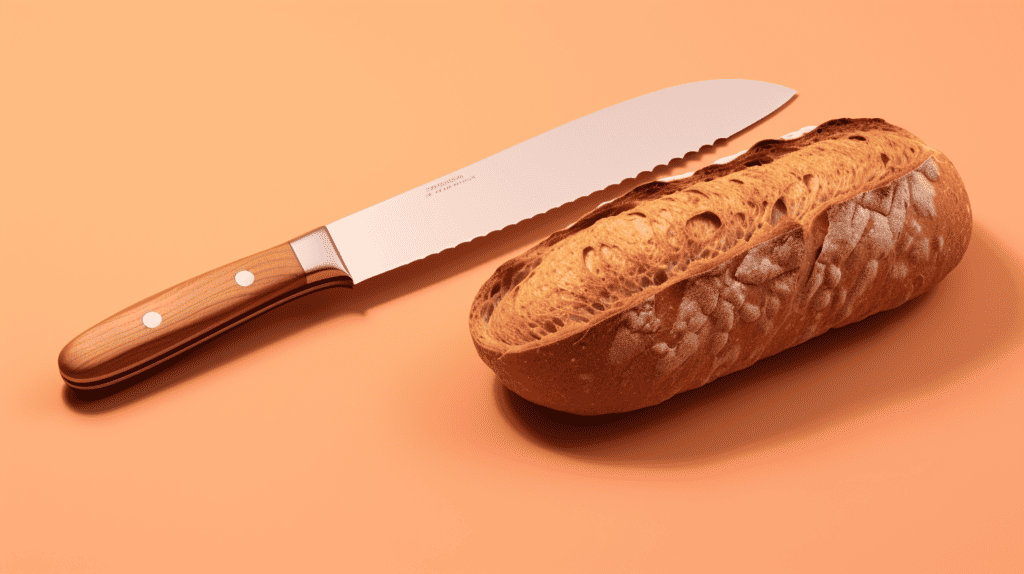
If you’re an avid baker, you know how important it is to have a sharp bread knife. A dull knife can make it difficult to slice through crusty loaves of bread without squishing them. Luckily, sharpening a bread knife is a simple process that can be done at home with the right tools.
The first step to sharpening a bread knife is to gather the necessary tools. You’ll need a tapered sharpening rod, which can come in various shapes and sizes. It’s recommended to use a diamond tapered sharpener for the best results. Once you have your tools, you’re ready to start sharpening your bread knife.
Understanding Bread Knives
When it comes to cutting bread, you need a specialized knife that can handle the task. Enter the bread knife. Bread knives are designed with a serrated edge that allows you to easily slice through bread without squishing or tearing it.
But not all bread knives are created equal. Here are a few things to keep in mind when choosing a bread knife:
- Blade Length: Bread knives come in various blade lengths, typically ranging from 7 to 12 inches. Choose a length that works best for the size of bread you typically slice.
- Serration: The serration on a bread knife can vary in size and shape. Some knives have large, deep serrations, while others have smaller, more numerous serrations. Look for a serration pattern that will work well for the type of bread you most often slice.
- Blade Material: Bread knives can be made from a variety of materials, including stainless steel, carbon steel, and ceramic. Each material has its own pros and cons, so choose the one that best fits your needs and preferences.
- Handle: The handle of a bread knife should be comfortable to hold and provide a secure grip. Look for a handle that is ergonomically designed and made from a durable material.
When it comes to using a bread knife, there are a few tips to keep in mind:
- Use a sawing motion: Because of the serrated edge, you’ll want to use a sawing motion when slicing bread. This will help you get a clean cut without squishing or tearing the bread.
- Use a cutting board: To protect your countertops and keep your bread knife sharp, always use a cutting board when slicing bread.
- Clean your knife properly: After each use, clean your bread knife with warm, soapy water and dry it thoroughly. Avoid putting it in the dishwasher, as the harsh detergents can damage the blade.
By choosing the right bread knife and using it properly, you can enjoy perfectly sliced bread every time.
Why Sharpening is Necessary
If you’re a bread lover, then you know how important a good bread knife is. It’s the perfect tool for slicing through crusty loaves of bread without crushing the soft interior. However, over time, even the sharpest bread knives can become dull, making it difficult to slice through bread without tearing it apart. That’s why sharpening your bread knife is so important.
When your bread knife is dull, it can cause a lot of problems. Not only will it make it harder to slice through bread, but it can also be dangerous. A dull knife requires more force to cut through bread, which means you’re more likely to slip and cut yourself. A sharp knife, on the other hand, requires less force to cut through bread, making it safer and easier to use.
Sharpening your bread knife also helps to extend its lifespan. A dull knife will wear down more quickly, which means you’ll have to replace it sooner. By keeping your knife sharp, you’ll be able to use it for longer, saving you money in the long run.
It’s also worth noting that sharpening a bread knife is not as difficult as you might think. With the right tools and a little bit of practice, you can easily sharpen your bread knife at home. And once you’ve sharpened it, you’ll be amazed at how much easier it is to slice through bread.
In summary, sharpening your bread knife is a necessary step in maintaining its effectiveness, safety, and longevity. With a sharp bread knife, you’ll be able to slice through bread with ease and precision, making your bread-loving life even more enjoyable.
Safety Measures
When sharpening a bread knife, it is important to take safety measures to prevent accidents and injuries. Here are a few tips to keep in mind:
- Wear protective gear: Always wear gloves and eye protection when sharpening a bread knife. Gloves will protect your hands from the sharp blade, while eye protection will prevent any debris from entering your eyes.
- Secure the knife: Use a non-slip surface or a clamp to secure the knife in place while sharpening. This will prevent the knife from slipping and causing injury.
- Sharpen away from your body: Always sharpen the knife away from your body to avoid accidentally cutting yourself.
- Use the right tools: Use a sharpening rod that is specifically designed for serrated knives. Using the wrong tool can damage the knife and increase the risk of injury.
- Keep the area clean: Make sure the area where you are sharpening the knife is clean and free of any clutter. This will prevent any accidents caused by slipping or tripping.
By following these safety measures, you can ensure that you sharpen your bread knife safely and effectively.
Choosing the Right Sharpening Tool
When it comes to sharpening your bread knife, choosing the right sharpening tool is crucial. You have a few options to choose from, including whetstones, knife hones, and electric sharpeners. Each tool has its own advantages and disadvantages, and the right choice depends on your personal preference and skill level.
Whetstone
A whetstone is a traditional sharpening tool that has been used for centuries. It is a rectangular stone that comes in different grits and sizes. To sharpen your bread knife with a whetstone, you need to wet the stone and place it on a stable surface. Then, hold the knife at a 20-degree angle and move it back and forth across the stone. Repeat this process on the other side of the blade until you have a sharp edge.
Whetstones offer a lot of control and precision, but they require some skill and practice to use effectively. They also take longer to use than other sharpening tools.
Knife Hone
A knife hone, also known as a sharpening steel, is a long, cylindrical rod made of steel or ceramic. To use a knife hone, you need to hold the knife at a 20-degree angle and run it along the hone, starting at the base of the blade and moving to the tip. Repeat this process on the other side of the blade until you have a sharp edge.
Knife hones are easy to use and offer quick results. However, they do not remove as much metal from the blade as other sharpening tools, so they are best used for regular maintenance rather than restoring a dull blade.
Electric Sharpener
An electric sharpener is a motorized machine that uses abrasive wheels to sharpen your knife. To use an electric sharpener, you need to insert the knife into the designated slot and turn on the machine. The machine will sharpen the blade automatically, and you can repeat the process until you have a sharp edge.
Electric sharpeners are easy to use and offer quick results. However, they can be expensive and may remove too much metal from the blade if not used correctly.
In conclusion, choosing the right sharpening tool depends on your personal preference and skill level. Whetstones offer precision but require practice, knife hones are easy to use but best for maintenance, and electric sharpeners are quick but can be expensive. Choose the tool that works best for you and your bread knife.
Step-by-Step Guide to Sharpening
Preparation
Before sharpening your bread knife, gather the necessary tools: a tapered sharpening rod, a damp cloth, and a cutting board. Make sure your knife is clean and dry before starting.
Sharpening Process
- Hold the tapered sharpening rod against the cutting board at a 20-degree angle.
- Place the serrated edge of the bread knife against the rod with the tip of the knife pointing upward.
- Starting at the base of the blade, pull the knife down and across the rod while maintaining a consistent angle.
- Repeat the process several times, alternating sides of the blade until the entire length of the serrated edge has been sharpened.
Finishing Touches
- Run the knife lightly over the honing steel to remove any burrs that may have formed.
- Test the sharpness of the knife by slicing through a piece of bread or tomato.
- If the knife is not sharp enough, repeat the sharpening process until the desired sharpness is achieved.
Remember to clean your knife and sharpening rod after use. With practice, you can keep your bread knife sharp and ready to slice through any crusty loaf or soft pastry with ease.
Maintaining Your Bread Knife
To ensure your bread knife remains sharp and effective, it’s important to keep it well-maintained. Here are some tips to help you maintain your bread knife:
Clean Your Bread Knife Properly
After each use, it’s important to clean your bread knife thoroughly. Use warm water and soap to clean the blade and handle, and dry it with a soft cloth. Avoid using abrasive sponges or harsh chemicals, as they can damage the blade and handle.
Store Your Bread Knife Correctly
Storing your bread knife properly can help prevent damage and keep it sharp. Store it in a knife block or sheath to protect the blade from other knives and objects. Avoid storing it in a drawer with other utensils, as they can cause damage to the blade.
Sharpen Your Bread Knife Regularly
To keep your bread knife sharp, it’s important to sharpen it regularly. You can use a sharpening stone or a sharpening rod to sharpen the blade. Hold the knife at a 20-degree angle and move it back and forth across the sharpening surface. Repeat on the other side of the blade. Be sure to follow the manufacturer’s instructions for your sharpening tool.
Use a Honing Steel
Using a honing steel can help keep your bread knife sharp between sharpenings. Hold the honing steel vertically and slide the blade down the steel at a 20-degree angle. Repeat on the other side of the blade. Be sure to use a honing steel that matches the serration of your bread knife.
Avoid Cutting Hard Objects
Avoid using your bread knife to cut hard objects, such as bones or frozen food. This can damage the blade and make it more difficult to sharpen.
By following these tips, you can keep your bread knife sharp and effective for years to come.
Conclusion
Sharpening a bread knife can be a simple task if you have the right tools and techniques. Remember to always use a tapered sharpening rod and to sharpen the knife on one side only, often the right side. It is recommended to use a diamond tapered sharpener for best results.
While it is important to keep your bread knife sharp, it does not need to be sharpened as often as your other knives. The serrated edge allows it to stay sharp for longer periods of time. However, it is still important to sharpen it when necessary to ensure clean and effortless cuts.
When sharpening your bread knife, be sure to follow the manufacturer’s instructions and take the necessary safety precautions. Always wear protective gear such as gloves and eye protection and keep your fingers away from the blade.
By following these simple steps, you can keep your bread knife in top condition and ensure it continues to serve you well in the kitchen. Happy slicing!
Frequently Asked Questions
Can you sharpen a bread knife in a knife sharpener?
Yes, you can sharpen a bread knife in a knife sharpener. However, it is important to choose a sharpener that is specifically designed for serrated knives. Using a sharpener that is not designed for serrated knives can damage the serrations and make the knife unusable.
How to sharpen a bread knife without tools?
Sharpening a bread knife without tools can be challenging, but it is possible. One method is to use the bottom of a ceramic coffee mug. Simply turn the mug upside down and run the serrated edge of the knife along the unglazed bottom of the mug. Another method is to use a piece of sandpaper. Fold the sandpaper in half with the grit facing out and run the serrated edge of the knife along the folded edge.
How do you sharpen a bread knife at home?
To sharpen a bread knife at home, you will need a sharpening rod or a sharpening stone. Hold the rod or stone at a 20-degree angle to the blade and run the serrated edge of the knife along the rod or stone. Be sure to maintain a consistent angle and apply light pressure. Repeat the process on the other side of the blade. It may take several passes to achieve a sharp edge.


