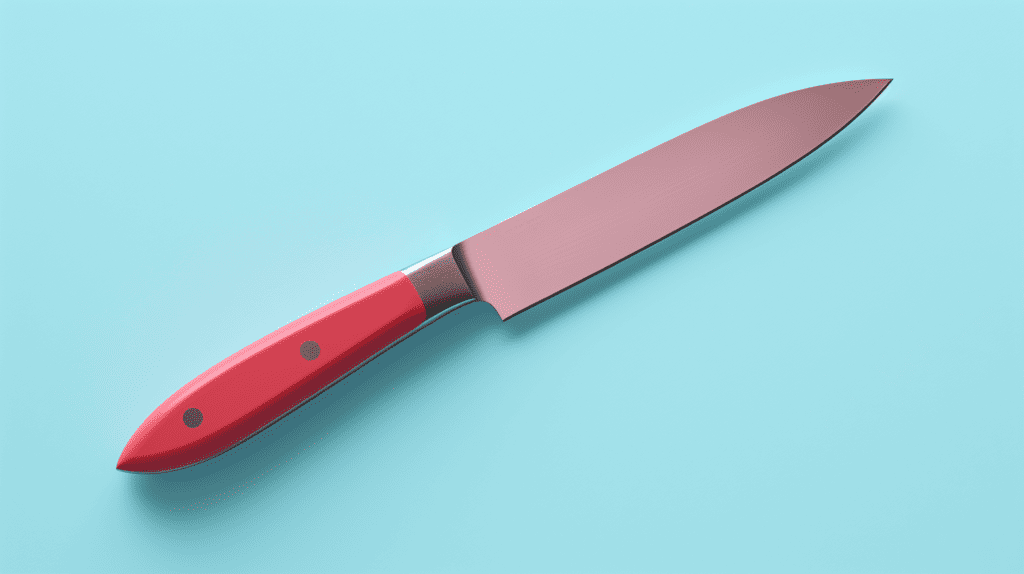
Sharpening a kitchen knife is an essential skill that every home cook should master. A sharp knife makes cooking easier, safer, and more enjoyable. A dull knife, on the other hand, is not only frustrating to use but also dangerous as it requires more force to cut through food and can slip and cause injury.
There are several methods to sharpen a kitchen knife, and each has its pros and cons. Some methods require special tools, such as a sharpening stone or an electric sharpener, while others can be done with everyday items, such as a coffee mug or a piece of sandpaper. Regardless of the method you choose, the key is to maintain a consistent angle and apply even pressure to the blade to ensure a sharp and even edge.
In this article, we will explore the different methods of sharpening a kitchen knife and provide step-by-step instructions on how to sharpen your knife safely and effectively. Whether you are a beginner or an experienced cook, you will learn valuable tips and tricks to keep your knives sharp and in top condition. So grab your knife and let’s get started!
Understanding the Need for Sharpening
Importance of a Sharp Kitchen Knife
Having a sharp kitchen knife is crucial for efficient and safe cooking. A dull knife can slip and cause injuries, and it can also make your cooking tasks more difficult and time-consuming. A sharp knife, on the other hand, can help you slice through ingredients with ease and precision, allowing you to cook faster and more accurately.
A sharp knife also ensures that your food looks and tastes better. When you use a dull knife, you risk crushing and mashing your ingredients, which can affect their texture and flavor. A sharp knife, on the other hand, can help you achieve clean and precise cuts, which can enhance the visual appeal of your food and preserve its flavor and texture.
Signs of a Dull Kitchen Knife
It’s important to know when your kitchen knife needs sharpening. Here are some signs that your knife may be dull:
- You need to apply more pressure than usual to cut through ingredients.
- You notice jagged or uneven edges on your cuts.
- You see small nicks or chips on the blade.
- You feel like you’re sawing through ingredients instead of slicing them.
If you notice any of these signs, it’s time to sharpen your knife. Remember, a sharp knife is an essential tool in any kitchen, and taking the time to maintain it will make your cooking experience safer, more efficient, and more enjoyable.
Types of Kitchen Knives
When it comes to kitchen knives, there are several types to choose from. Each type is designed for a specific task, so it’s important to have a variety of knives in your kitchen to make meal prep easier and more efficient.
Chef’s Knife
The chef’s knife is the most versatile knife in the kitchen. It has a wide blade that allows you to chop, slice, and dice vegetables, fruits, and meats with ease. The blade is typically 8-10 inches long and has a curved edge that allows you to rock the knife back and forth while cutting.
Paring Knife
The paring knife is a small knife with a thin blade that is perfect for peeling and trimming fruits and vegetables. It’s also great for intricate tasks like deveining shrimp or trimming fat from meat. The blade is typically 3-4 inches long and has a straight edge.
Bread Knife
The bread knife has a long, serrated blade that is perfect for cutting through crusty bread without squishing it. The serrated edge allows you to saw through the bread without tearing it, making it perfect for slicing bagels, rolls, and other baked goods.
Utility Knife
The utility knife is a smaller version of the chef’s knife. It’s perfect for tasks that require more precision than a chef’s knife, like trimming meat or slicing cheese. The blade is typically 4-6 inches long and has a straight edge.
Santoku Knife
The santoku knife is a Japanese-style knife that is similar to the chef’s knife. It has a shorter, wider blade that is perfect for slicing, chopping, and dicing. The blade is typically 5-7 inches long and has a straight edge.
Steak Knife
The steak knife has a sharp, serrated edge that is perfect for cutting through meat. It’s typically used at the table to cut through steak, but it can also be used in the kitchen for tasks that require a sharp, serrated edge.
Having a variety of kitchen knives will make meal prep easier and more efficient. Make sure to choose knives that are comfortable to hold and use, and keep them sharp to ensure that they work properly.
Choosing the Right Sharpening Tool
When it comes to sharpening your kitchen knife, there are several tools you can use. Each tool has its own advantages and disadvantages. Here are the three main types of sharpening tools you can choose from:
Sharpening Stones
Sharpening stones are the traditional way to sharpen a knife. They come in different grits, and you use them to grind away the dull edge of your knife. Sharpening stones require some skill and practice to use correctly, but they can produce a razor-sharp edge on your knife.
Some advantages of using sharpening stones include their versatility, as they can be used on any type of knife, and their durability, as they can last for years. However, sharpening stones can be time-consuming to use, and they require some maintenance to keep them in good condition.
Honing Rods
Honing rods, also known as sharpening steels, are used to maintain the sharpness of your knife’s edge. They don’t actually sharpen the knife, but instead, they straighten the edge of the blade to keep it sharp. Honing rods are quick and easy to use, and they can help extend the life of your knife’s edge.
Honing rods are best used on knives that are already sharp but have lost their edge through regular use. They are not effective at sharpening dull knives. Some disadvantages of using honing rods include their limited effectiveness on very dull knives and their lack of versatility, as they are not suitable for all types of knives.
Knife Sharpeners
Knife sharpeners are electric or manual tools that can quickly and easily sharpen your knife’s edge. They come in a variety of styles, from pull-through sharpeners to electric sharpeners, and they can be very effective at producing a sharp edge on your knife.
Some advantages of using knife sharpeners include their speed and ease of use, as they can sharpen your knife in just a few minutes. They are also very effective at sharpening dull knives. However, knife sharpeners can be expensive, and they may not be suitable for all types of knives.
In summary, choosing the right sharpening tool depends on your needs and preferences. Sharpening stones are versatile and durable but require some skill to use. Honing rods are quick and easy to use but are best used on knives that are already sharp. Knife sharpeners are fast and effective but can be expensive and may not be suitable for all types of knives.
Preparation for Sharpening
Before you start sharpening your kitchen knife, it is essential to prepare the necessary tools and equipment. Here are the steps you need to take to prepare for sharpening:
- Gather the necessary tools: You will need a sharpening stone, honing steel, and a towel. You can also use an electric knife sharpener if you have one.
- Clean the knife: Before sharpening, clean the knife with soap and water to remove any dirt or debris that might affect the sharpening process.
- Choose the right angle: The angle at which you sharpen your knife depends on the type of knife you have. Most kitchen knives have a bevel angle of 20 degrees. However, some Japanese knives have a bevel angle of 15 degrees. Check the manufacturer’s instructions or use a protractor to determine the angle of your knife.
- Select the right grit: Sharpening stones come in different grits, ranging from coarse to fine. Coarse grits are used for repairing damaged or dull blades, while finer grits are used for honing and polishing. Choose the grit that matches your knife’s condition and the level of sharpness you want to achieve.
- Set up your workspace: Find a clean, flat surface to work on. Place a towel underneath the sharpening stone to prevent it from slipping. Make sure you have enough light to see the blade’s edge and the angle you’re sharpening at.
By following these steps, you can ensure that you have everything you need to sharpen your kitchen knife effectively.
Step by Step Guide to Sharpening
Sharpening your kitchen knife is an essential skill that every home cook should know. With a little practice, you can easily sharpen your knife like a pro. Here is a step-by-step guide to sharpening your kitchen knife.
Using a Sharpening Stone
- Start by placing the sharpening stone on a flat surface. You can use a wet towel underneath the stone to keep it from slipping.
- Hold the knife at a 20-degree angle against the stone. You can use a sharpening guide to help you maintain the angle.
- Begin with the coarse side of the stone and move the knife back and forth across the stone in a sweeping motion. Use light pressure and keep the angle consistent.
- After a few strokes, switch to the fine side of the stone and repeat the process.
- Test the sharpness of the knife by slicing through a piece of paper or a tomato.
Using a Honing Rod
- Hold the honing rod vertically in your non-dominant hand.
- Hold the knife at a 20-degree angle against the honing rod with the blade facing away from you.
- Starting at the base of the blade, draw the knife down the honing rod while maintaining the angle.
- Repeat the process on the other side of the blade.
- Test the sharpness of the knife by slicing through a piece of paper or a tomato.
Using a Knife Sharpener
- Place the knife sharpener on a flat surface.
- Hold the knife sharpener with your non-dominant hand and the knife with your dominant hand.
- Draw the knife through the coarse slot of the sharpener a few times.
- Repeat the process with the fine slot.
- Test the sharpness of the knife by slicing through a piece of paper or a tomato.
Remember to always use caution when handling sharp objects. With practice, you can easily sharpen your kitchen knife to keep it in top condition.
Safety Measures While Sharpening
When sharpening a kitchen knife, it is important to take certain safety measures to prevent accidents and injuries. Here are some safety tips to keep in mind while sharpening your knife:
- Use a non-slip surface: Make sure the surface you are using to sharpen your knife is non-slip. A cutting board or damp towel can provide a stable surface to prevent the knife from slipping while sharpening.
- Wear protective gear: To prevent any accidents, wear protective gear such as gloves and eye protection while sharpening your knife.
- Maintain a consistent angle: When sharpening your knife, it is important to maintain a consistent angle. This will ensure that you are sharpening the blade evenly and prevent any damage to the blade.
- Use the right sharpening tool: Use the right sharpening tool for your knife. Different knives require different sharpening tools, so make sure you are using the appropriate one.
- Keep your fingers away from the blade: While sharpening your knife, make sure to keep your fingers away from the blade. Hold the knife by the handle and use a sharpening tool to sharpen the blade.
- Don’t rush: Take your time while sharpening your knife. Rushing can lead to accidents and injuries.
By following these safety measures, you can ensure that you sharpen your kitchen knife without any accidents or injuries.
Maintaining Your Kitchen Knife
To keep your kitchen knife sharp, it’s important to maintain it regularly. Here are some tips to help you maintain your knife:
- Keep your knife clean: After each use, clean your knife with warm water and mild soap, then dry it thoroughly. Avoid using abrasive sponges or harsh detergents, which can damage the blade.
- Store your knife properly: Store your knife in a knife block or sheath to protect the blade and prevent it from getting dull. Avoid storing your knife in a drawer, where it can get banged around and damaged.
- Hone your knife regularly: Honing your knife helps to realign the blade’s edge and keep it sharp. Use a honing steel or ceramic rod to hone your knife before each use.
- Sharpen your knife when necessary: If your knife is dull and honing doesn’t help, it’s time to sharpen it. You can sharpen your knife using a whetstone, electric sharpener, or manual sharpener. Follow the manufacturer’s instructions carefully to avoid damaging your knife.
- Use your knife properly: Use your knife for its intended purpose and avoid using it on hard surfaces like glass or stone. Don’t twist or pry with your knife, as this can damage the blade.
By following these tips, you can maintain your kitchen knife and keep it sharp for years to come.
Frequently Asked Questions
How to sharpen a kitchen knife with a stone for beginners
If you are new to sharpening your kitchen knife with a stone, it can seem like a daunting task. However, with a little practice, you can become proficient. First, you will need to choose the right stone. A whetstone with a coarse grit of around 1000 is ideal for beginners. Next, you will need to hold the knife at the correct angle, usually between 15 and 20 degrees. Finally, use a consistent motion to sharpen the blade, moving it across the stone in a back-and-forth motion.
How often should you sharpen a kitchen knife?
The frequency with which you should sharpen your kitchen knife depends on how often you use it. A general rule of thumb is to sharpen your knife every few months if you use it regularly. However, you should also pay attention to how the knife feels when you use it. If it starts to feel dull or less effective, it’s time to sharpen it.
What are some tips when sharpening a kitchen knife?
When sharpening your kitchen knife, there are a few tips to keep in mind. First, make sure the stone is wet before you start sharpening. This will help prevent the blade from overheating and becoming damaged. Second, use a consistent motion when sharpening the blade. This will help ensure that the blade is sharpened evenly. Finally, make sure to clean the blade after sharpening to remove any metal shavings.


